Page 4 of 8
Re: underway again
Posted: Fri Sep 04, 2020 3:06 pm
by AiRdAd
What are you doing here Lawrence? - it's an interesting technique I haven't seen before

Re: underway again
Posted: Fri Sep 04, 2020 5:08 pm
by Lawrence
Lostininverness wrote: ↑Thu Sep 03, 2020 6:58 pm
Nice work Lawrence! Is the width of the neck template cut to the exact same dimension as the neck pocket? Did the acrylic templates cost much to get cut (if you don't mind me asking)?
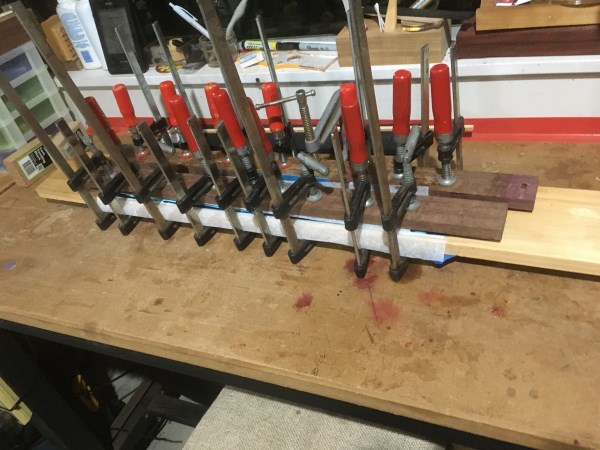
Yes the neck template is an exact fit for the pocket. I put a single layer of masking tape on the template when I trim the neck and that gives me a really tight fit...it needs a fair bit of force to get it in the first few times. I need ti try to limit my fitting process cos each time it goes in and out it loosens a tiny fraction It never gets to the point of not needing to be pushed in though.
The whole sheet as shown cost $250 to supply and cut. Its a question of how many times I use it as to the cost per guitar. On my 24 fret template Ive done 6 guitars since I last edited the shape.
Note I also have some Pickup rings in there....I do like transparent rings - and I struggle to make wooden ones that are consistent enough. These ones just need rounding off, polishing and they are good to go,
Re: underway again
Posted: Fri Sep 04, 2020 5:08 pm
by Lawrence
Re: underway again
Posted: Sat Sep 05, 2020 10:53 am
by Lawrence
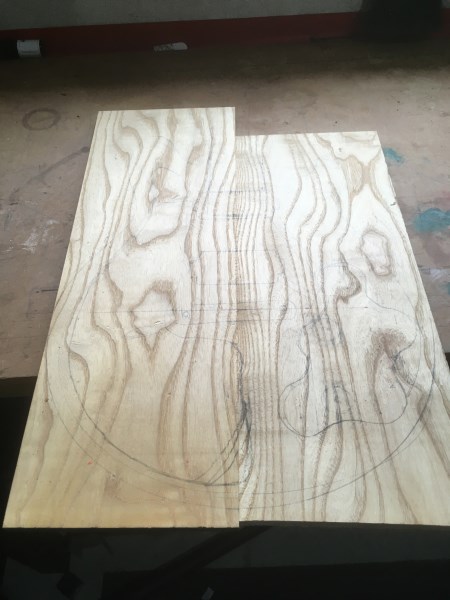
so time to start the tops
23 is going to be ash...
- 13.jpg (51.58 KiB) Viewed 5288 times
and 24 is maple

- 14.jpg (42.36 KiB) Viewed 5288 times
Re: underway again
Posted: Sat Sep 05, 2020 10:57 am
by Lawrence
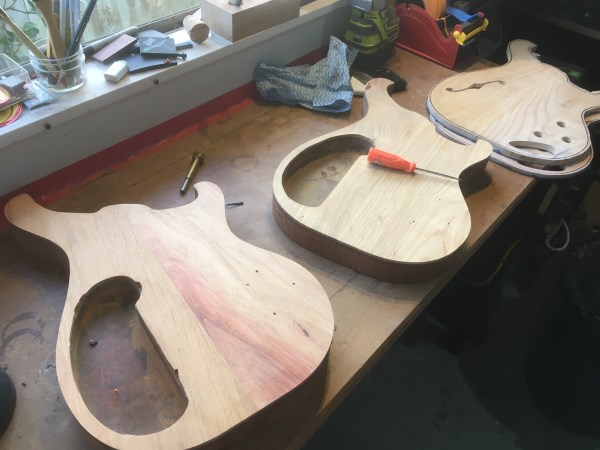
jointed and cut out....

- 15.jpg (58 KiB) Viewed 5287 times
here with the body which has the rosewood layer and veneer glued up

- 17.jpg (61.69 KiB) Viewed 5287 times
Re: underway again
Posted: Sat Sep 05, 2020 11:02 am
by Lawrence
here the top has had the f hole cut and the holes where the pots and the jack socket actually mount onto the rosewood...

- 18.jpg (52.35 KiB) Viewed 5286 times
and the rosewood is prepped for the tops to be glued
- 19.jpg (53.05 KiB) Viewed 5286 times
Re: underway again
Posted: Sun Sep 06, 2020 4:07 pm
by Lawrence
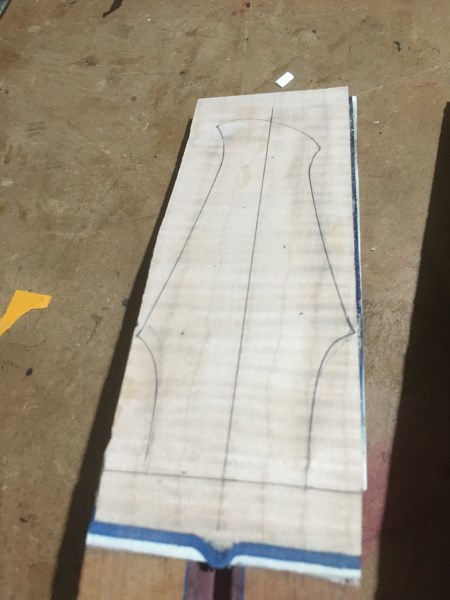
time to move the necks along...

- 20.jpg (51.57 KiB) Viewed 5207 times
a 11 degree angle...the most I can get with the headstock design but more than enough.

- 21.jpg (50.29 KiB) Viewed 5207 times

- 22.jpg (47.7 KiB) Viewed 5207 times
Re: underway again
Posted: Sun Sep 06, 2020 4:08 pm
by Lawrence
and the headplates on>
one maple
one ebony
both with blue and white veneers....

- 25.jpg (63.78 KiB) Viewed 5207 times
- 26.jpg (46.52 KiB) Viewed 5207 times

- 27.jpg (50.96 KiB) Viewed 5207 times
Re: underway again
Posted: Sun Sep 06, 2020 4:22 pm
by Jay
Coming together nicely. How thick are the headplates? I see you extended the neck by planing off the headplate extra bits. I made the mistake to glue it on after having routed the whole neck so was then forced to reduce the neck thickness again to compensate for the extra plate. I won't make that mistake again

Re: underway again
Posted: Sun Sep 06, 2020 5:02 pm
by Lawrence
Jay wrote: ↑Sun Sep 06, 2020 4:22 pm
Coming together nicely. How thick are the headplates? I see you extended the neck by planing off the headplate extra bits. I made the mistake to glue it on after having routed the whole neck so was then forced to reduce the neck thickness again to compensate for the extra plate. I won't make that mistake again
these are 4 mm. The plate makes it much stronger.Im still not quite sure about calculating my length calculated in advance...getting better. I had to move the truss rod and fill a small gap at the body end.
Re: underway again
Posted: Wed Sep 09, 2020 5:13 pm
by Lawrence
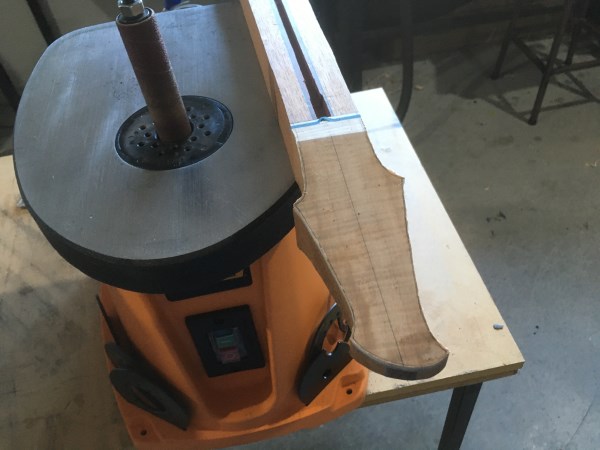
Ok so having glued on the head plates its time to rough cut the headstock

- 28.jpg (46.79 KiB) Viewed 5081 times
- 29.jpg (46.39 KiB) Viewed 5081 times
then its tine to start a tricky job...
I should have taken more shots here>
I have cut thin strips of maple and Im gluing blue and white veneer to then here
- 30.jpg (72.6 KiB) Viewed 5081 times
Re: underway again
Posted: Wed Sep 09, 2020 5:17 pm
by Lawrence
..and then I glued those to the side of my fretboard...after trimming the board down to 5 mm less than i need for the end measurement...
- 31.jpg (70.63 KiB) Viewed 5081 times
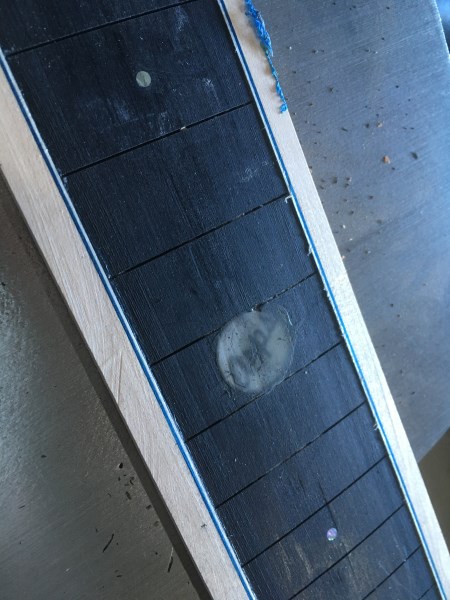
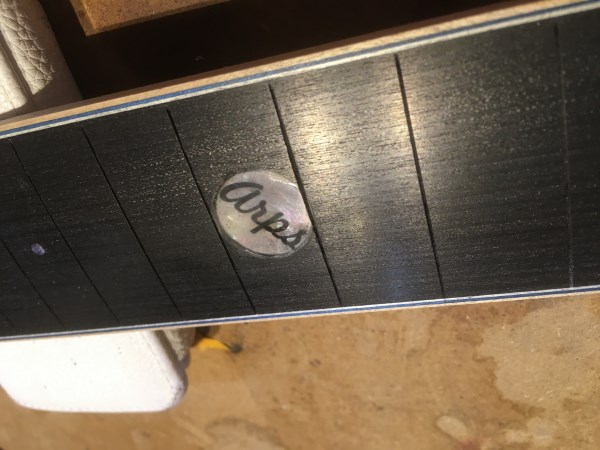
then plane down the excess to get this...of and since Im using my small headstock I decided to out the logo on the Fretboard> This created a bit of an issues since the they are not designed for a radious surface....but you will see that later.

- 32.jpg (46.83 KiB) Viewed 5081 times
- 33.jpg (58.67 KiB) Viewed 5081 times
Re: underway again
Posted: Wed Sep 09, 2020 5:39 pm
by Jay
That fretboard is looking great with that binding. Interesting how you complete the fretboard first before gluing it on the neck. I do the reverse but don't use binding...
Also, is your logo made of MoP?
Re: underway again
Posted: Wed Sep 09, 2020 6:13 pm
by Lawrence
Jay wrote: ↑Wed Sep 09, 2020 5:39 pm
That fretboard is looking great with that binding. Interesting how you complete the fretboard first before gluing it on the neck. I do the reverse but don't use binding...
Also, is your logo made of MoP?
yes and yes,,,
The binding thing is to hide the fret ends and I considered gluing on while the outside maple edge was still oversize but felt better going this way. Im still learning so every time Im re thinking and trying new things.
This logo is actually printed onto MoP with a resin top. It seemed like a simple idea and worked well on the last couple of guitars with the bigger headstock. The challenge here is that the resin is only;y 0.5 mm thick and so ive touched the print in the radius. Im not stressed about that but I need to rethink next time.
Re: underway again
Posted: Thu Sep 10, 2020 5:57 pm
by Lostininverness
The challenge here is that the resin is only;y 0.5 mm thick and so ive touched the print in the radius. Im not stressed about that but I need to rethink next time.
You could try sinking the inlay in a bit deeper and filling with CA glue over top - it has a beneficial ability to "mound" up a bit so will sit well proud of the final surface. I've done that with some MoP dots that I've drilled a bit too low. All fine so far......